Author: Arpna

Starting with Elementor : How to edit pages in wordrpess using Elementor ?

So here are the other Queries related to this Topic …..

  1. Elementor builder .. how to edit pages and posts using elementor.
  2. How to edit blog pages in elementor.
  3. Edit pages/Posts in elementor builder.
  4. editing wordpress with elementor.
  5. how to edit a wordpress page with elementor.

Elementor is a popular page builder plugin for WordPress that allows you to create custom layouts and design beautiful, responsive web pages without the need for coding knowledge. If you’re starting with Elementor, here are some steps to get you going:

1. Install and Activate Elementor: If you haven’t installed Elementor yet, follow the steps mentioned earlier to install and activate the plugin.

edit pages in wordrpess using Elementor


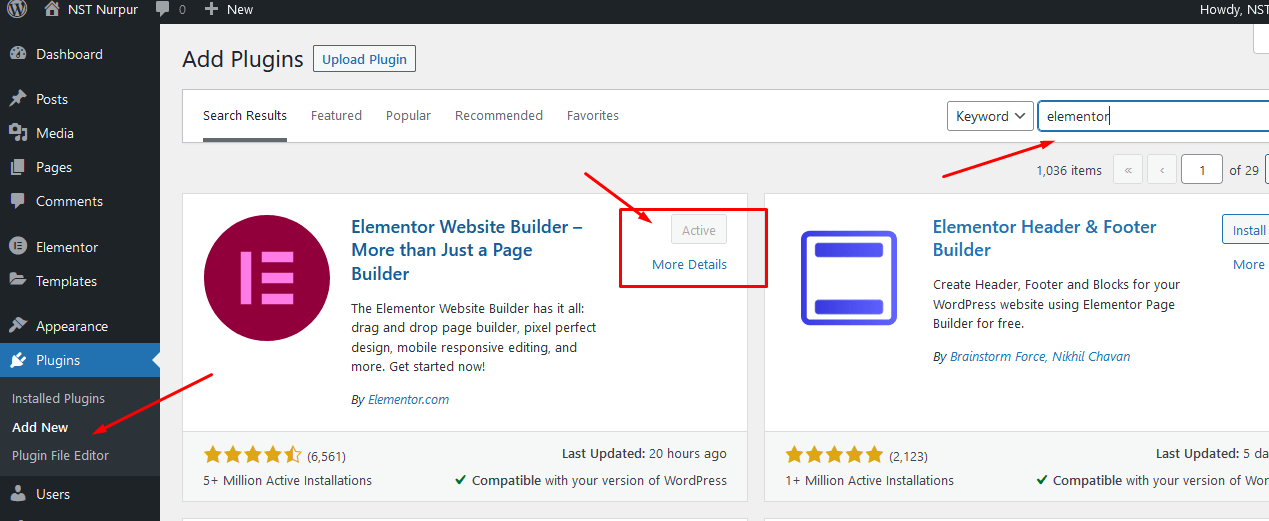
2. Create a New Page or Edit an Existing One: To use Elementor, go to your WordPress dashboard and navigate to “Pages” or “Posts” (depending on where you want to create your content). Create a new page/post or edit an existing one.

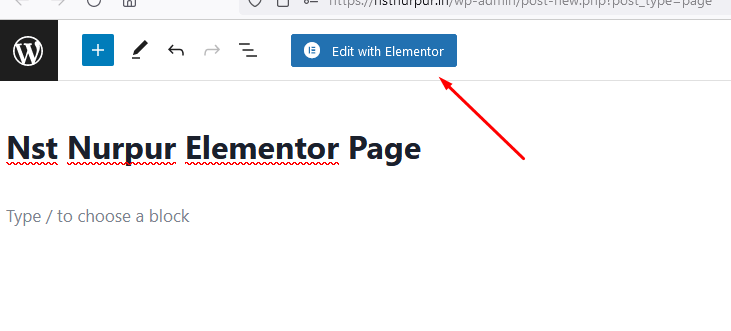
3. Launch Elementor: In the page or post editor, look for the “Edit with Elementor” button. Click on it to launch the Elementor page builder.

edit pages using Elementor

4. Explore the Interface: Once Elementor is active, you’ll be taken to the Elementor interface. The main screen is divided into two sections: the left sidebar with the widget panel and settings, and the live preview on the right side, where you’ll design your page.

5. Add Sections and Columns: Start by adding a new section to your page layout. Click the “Add Section” button in the Elementor panel, and a section will appear in the live preview. Within each section, you can add columns by clicking the “Add Column” button.

6. Add Elements (Widgets): Elementor provides a wide range of elements (or widgets) you can drag and drop into your columns. These elements include headings, images, buttons, text blocks, videos, forms, and much more. Explore the widget panel to find the elements you want to add.

7. Customize the Elements: Once you’ve added an element, you can customize it using the settings in the left sidebar. Each element has its own set of options, allowing you to change colors, fonts, sizes, and other style settings.

I hope this helps you a lot … to how to edit pages in wordrpess using Elementor ..

If you need any further help please contact me with contact form or chat box or other way i added in the website.

Thanks 🙂🙏


How to install or add plugin in wordpress website ?

To install a plugin in WordPress, you can follow these steps:

1. Log in to Your WordPress Dashboard: Go to your WordPress website’s admin area by entering your website URL followed by “/wp-admin” (e.g.,
www.yourwebsite.com/wp-admin). Enter your username and password to log in.

2. Navigate to the Plugins Page: In the WordPress dashboard, locate the “Plugins” option on the left-hand menu. When you hover over it, a submenu will appear, and you should click on “Add New.”

3. Search for the Plugin: On the “Add Plugins” page, you can search for a specific plugin by name. Enter the plugin’s name in the search bar on the right side and press “Enter” to search for it.

4. Choose the Plugin to Install: Browse through the search results to find the plugin you want to install. When you find the desired plugin, click on the “Install Now” button located below the plugin’s name and description.

5. Activate the Plugin: After the installation is complete, you will see an “Activate” button. Click on it to activate the plugin. Some plugins may require additional configuration, but many will start working immediately after activation.

6. Install a Plugin Manually (Optional): If you have a plugin in the form of a ZIP file and cannot find it in the WordPress plugin directory, you can install it manually. To do this, go to the “Add Plugins” page as described earlier, but this time, click on the “Upload Plugin” button at the top of the page. Select the ZIP file from your computer and click “Install Now.” After installation, activate the plugin as mentioned in Step 5.

7. Configure the Plugin (if necessary): Some plugins may require additional setup or configuration. After activation, you may see a notification or find a new settings option in the WordPress dashboard. Follow the plugin’s documentation or on-screen instructions to configure it according to your needs.

8. Update Your Plugins (Important): Regularly check for plugin updates to ensure you are using the latest version. Outdated plugins can cause security vulnerabilities or compatibility issues. To update plugins, go to the “Plugins” page in the WordPress dashboard. If there are updates available, you will see a notification next to the plugins. Simply click the “Update Now” link to update the plugin.

That’s it! You have successfully installed a plugin on your WordPress website. Keep in mind that while most plugins are safe and well-maintained, using too many plugins or outdated ones can impact your site’s performance and security. Only install plugins from reputable sources and those that are regularly updated.

Click to Chat