Author: NST

Myself Narender Singh Thakur ( NST ) and i share my Experience/Knowledge and Tricks for folks and beginners to solve their issues while making websites through this Planet.

No save button in contact Joomla backend !

When you want to add new contacts and you notice that, there is no save button on that page. So here is the simple way to solve that ..
 
1) Go to Components > Contacts > Categories ..like this
 
no-save-contact-joomla


2) Then edit all the categories and hit on save button..Like here
 
no save button contact joomla


3) After save all categories.. go to contact and add new contact … now you can see the save button will be there..
 
save button

 
That’s it 🙂


Show jQuery popup only first time visit of website page?

Here are the way to show popup for first time visit and the difference between them are..
 
1) Localstorage – Assigned value stored after browser close.
2) SessionStorage – Assigned value removed after browser or tab close.


1) Localstorage  

Localstorage value can be removed by deleting the cache of browser.

/// show div first time
var isshow = localStorage.getItem('isshow');
if (isshow== null) {
localStorage.setItem('isshow', 1);
// Show popup here
setTimeout(function(){
jQuery('#letcont').modal('show');
},5000);
}

 
2) SessionStorage  
Assigned value removed after browser or tab close

/// show div first time
var isshow = sessionStorage.getItem('isshow');
if (isshow== null) {
sessionStorage.setItem('isshow', 1);
// Show popup here
setTimeout(function(){
jQuery('#letcont').modal('show');
},5000);


Modal or content to show

Add this code to theme footer.php file ..
 
<div id="letcont" class="modal fade" role="dialog">
<div class="modal-dialog">
<!-- Modal content-->
<div class="modal-content">
<div class="modal-header">
<button type="button" class="close" data-dismiss="modal">×</button>
<h4 class="modal-title">Contact Us</h4>
</div>
<div class="modal-body"> <?php echo do_shortcode('

Error: Contact form not found.

');?> </div>
</div>
</div>
</div>

 
You can change the Contact form 7 shortcode to your one code.


To help contact use here.

Show popup once for new website page visitors !

So if you want to show the popup on the website for first time visitors then follow this..

First of all add this code to theme footer.php file ..

<div id="letcont" class="modal fade" role="dialog">
<div class="modal-dialog">
<!-- Modal content-->
<div class="modal-content">
<div class="modal-header">
<button type="button" class="close" data-dismiss="modal">×</button>
<h4 class="modal-title">Contact Us for Learn More</h4>
</div>
<div class="modal-body"> <?php echo do_shortcode('

Error: Contact form not found.

');?> </div>
</div>
</div>
</div>

 
You can change the Contact form 7 shortcode to your one code.

 
And after that.. add this script…
 
<script type="text/javascript">
jQuery(document).ready(function() {
/// show div first time visitors
var isshow = sessionStorage.getItem('isshow');
if (isshow== null) {
sessionStorage.setItem('isshow', 1);
// Show popup here
setTimeout(function(){
jQuery('#letcont').modal('show');
},10000);
}
});
</script>

 
Here is the difference between Local and Session storage..
 

You can change the time to show popup too.. now i adjusted to show after 10 second.. you can change number 10000 to your one..
1 second = 1000 .. so calculate as per your need.
 
popup new visitor show-popup first time visitor

 
That’s it 🙂 .. if still need help don’t forget to comment or directly contact with us…. Thanks 🙂

Bootstrap Modals , Dialog box, Popup form wordpress

Bootstrap to show the “Contact Form 7” Form in Popup on click buttons..

Here are the step’s..

1) First need to add button.. where you want to show ..

<div class="nst-center">
<a class="btn btn-default btn-rounded" data-toggle="modal" data-target="#nstregister">Contact Us</a>
</div>


2) Go to Dashboard, Contact form 7 and create or use existing form shortcode..

bootstrap popup contact form 7


3) Add this to footer or if you are using visual editor then add to “raw html” element.

<div class="modal fade" id="nstregister" tabindex="-1" role="dialog" aria-labelledby="myModalLabel" aria-hidden="true">
<div class="modal-dialog" role="document">
<div class="modal-content">
<div class="modal-header text-center">
<h4 class="modal-title w-100 font-weight-bold">Contact Info</h4>
<button type="button" class="close" data-dismiss="modal" aria-label="Close">
<span aria-hidden="true">×</span>
</button>
</div>
<div class="modal-body mx-3">
/** You contact form 7 code here or any form code **/


</div>
</div>
</div>
</div>


3) Then you can add style to show the form style something like this..

contact form 7 nstplanet modal form


4) All is done.. Contact Us if you want any help to configure this..


Shopify Debut theme multi level menu issue solved without plugin !

Here are the steps to add Multi sub level menu in Shopify debut theme.
 
** Make Sure you have the backup of the files. **
 
1) First of all replace code in site-nav.liquid.. download from here.


2) Here is the Custom.css file for style that.. you can add this to your theme by creating new one there in Assets section.


3) Also add “>” arrow to this properties in the file theme.scss.liquid.


debut theme multi level menu


4) Replace header.liquid file with this one.


5) Create sub menu in dashboard like..

debut theme multi level menu


5) finally you got like this..
 
shopify multi level
 

🙁 If still have issue than comment or contact with me by using contact form.


custom icon for custom post type in wordpress !

To add custom icon for custom post type .. you can use this function for that..

// Add this to functions.php file..

When you are going to create custom post type then by default icon code will be like this..

'menu_icon' => 'dashicons-cart',

 
You can also add the full URL of an image file you want to display as icon, like this: you can change path..
 
'menu_icon' => 'http://www.nstplaent.com/wp-content/uploads/2017/04/nst-icon.png',

 
You can upload image with size around 22 x 22 and upload there in dashboard media or in theme images folder.

 
Also can adjust or align icon by using admin css function.

 
admin css icon aligned


increase php upload post and max input value in wordpress !

The way to increase upload max file size wordpress..

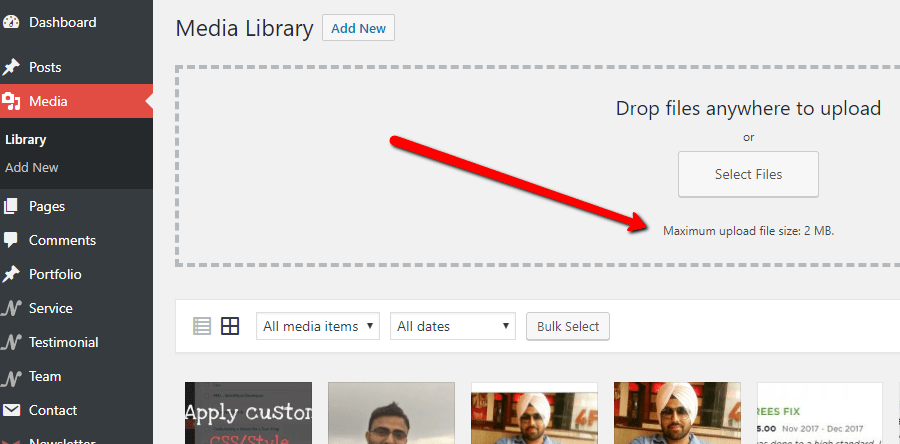
How to check the media uploaded max file size in your website so you can check by visiting here..

 increase upload max file


So here are the way to increase size :- 

1) Put this in you .htaccess file of website root folder .. you can change size as per your need by editing file through cpanel or Filezilla.

php_value upload_max_filesize 50M
php_value post_max_size 50M
php_value max_execution_time 180
php_value max_input_time 180


2) The second way by creating or modify PHP.ini file .. from hosting root folder.. you can find this file in /wp-admin folder .. if this file is not there then you can create with name php.ini and add the below code ….

upload_max_filesize = 50M
post_max_size = 50M
max_execution_time = 180


3) Through functions.php or wp-config.php file

@ini_set( 'upload_max_size' , '50M' );
@ini_set( 'post_max_size', '50M');
@ini_set( 'max_execution_time', '300' );

 
4) By adding plugin into site increase upload max size to site and add upload size there.

 
5) You can directly contact with hosting support to increase the file size upload limit.

🙂
 

Simple captcha for wp contact form 7 forms !

simple captcha

To use simple captcha for wordpress contact form 7 forms .. instead of google default “I am not robot” photos validation.

Picture validation looks little long to validate any form.. so here is the solution for who want to apply simple validation like input fields..

Steps to follow :

1) First of all install this plugin Really Simple CAPTCHA.


2) Copy this code structure and edit your contact form and paste near the submit button ..you can change name if you want.

<div class="securt"><label> Enter Security code:</label> [captchac captcha-nst size:l] [captchar captcha-nst 4/4]</div>
 
edit_cf7_form
 

3) Now let’s do some style i did with my form code and added to style.css file ..you can adjust as per your primary color.

.wpcf7-form-control.wpcf7-captchar {
width: 100%;
margin-left: 20px;
max-width: 240px;
}
.securt label {
display: block;
margin-bottom: 10px;
color: #F64F57;
}


4) Now save and check the form on page.. your output will be like this.

 
contact form 7 simple captcha


How to add Custom fields on product page or particular product in shopify ?

To add Custom field’s on particular product’s on Shopify website.. there are many free app available on Shopify store but i like this one …so here are the simple Step’s to do that easily..

1) First of all from the Shopify store search there infinite Option .

shopify app store


2) Install this into your Shopify store and go to your website App option and find there this app.

shopify


3) Now scroll down that window and click on New Option on right side..

new soption set shopify


4) Add field name and type etc there.. like this you can apply conditions there to show that fields.

custom fields


5) Save this and go to product.liquid or product-template.liquid and find form there ..by search option or you can find manually..


6) Add this <div id=”infiniteoptions-container”> </div> inside the form tag where you want to show the custom fields.

shopify inside form


7) Now save and go to you product page and check the fields will be there..Like this..

shopify-custom-fields
 

If User Logged in.. Show and hide Menu in wordpress !

Sometime we want to hide some menu item for site visitors so with the help of these wordpress function we can do that easily.

1st Way..
First edit your theme functions.php file and Register Navigation menu by using register_nav_menus() function there, like this..

<?php function register_nst_nav() {
register_nav_menus(
array(
'logged-in' => __( 'Logged in' ),
'logged-out' => __( 'Logged out' )
)
);
}
add_action( 'init', 'register_nst_nav' ); ?>

 
Than you can add the below one code to your header.php or footer.php file..
 

<?php if (is_user_logged_in()) {
wp_nav_menu( array( 'theme_location' => 'logged-in' ) );
} else {
wp_nav_menu( array( 'theme_location' => 'logged-out' ) );
} ?>

 
Go to Appearance > Menus page and then add menu item to both logged in and logged out Menus..Like this
 
wp hide show menu

 
Now hit Save Menu button there to save menus and after that you can see the output on the header or footer section of the site ! 🙂


2nd way to do this is by using plugin..

By using this https://wordpress.org/plugins/if-menu/ plugin . you can show and hide menu item as per user role, logged in etc.. its a very simple way to do this.

Click to Chat