Author: NST

Myself Narender Singh Thakur ( NST ) and i share my Experience/Knowledge and Tricks for folks and beginners to solve their issues while making websites through this Planet.

How to change Entire site Default text Checkout page text in Shopify ?

To change Entire site Default text or on checkout and cart  page .. follow these steps…

  1. Login to your shopify Store and goto Online Store.
  2. Click on “Edit Language” of active template …language change in shopify
  3.  

  4. The window will be like this..
    change Entire site Default text , checkout page text or all over text change in shopify
  5.  

  6. Click on Tabs which one you want to change.. like if you want to change “Breadcrumb”  text on Checkout page…Go-to Checkout tabs.


How to install WordPress on Hosting control panel manually ?

Here are the Steps to Configure wordpress manually on Hosting Control Panel…

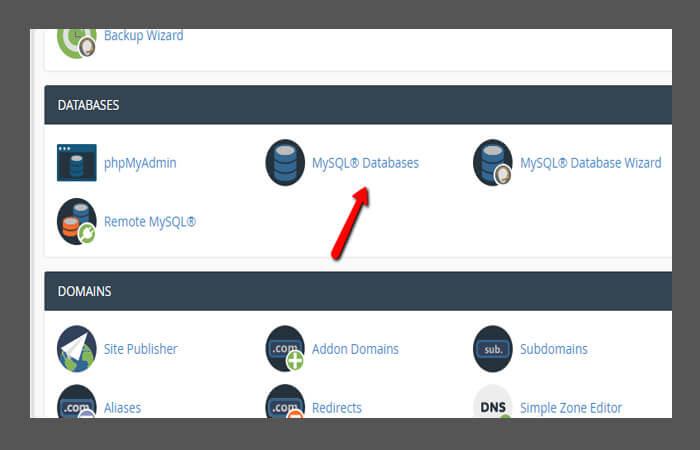
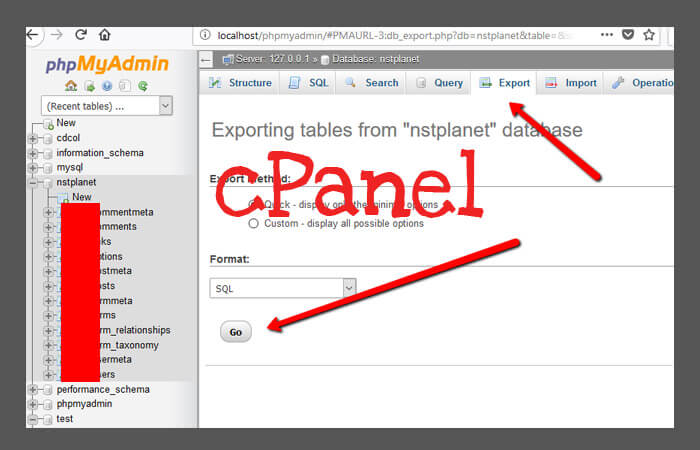
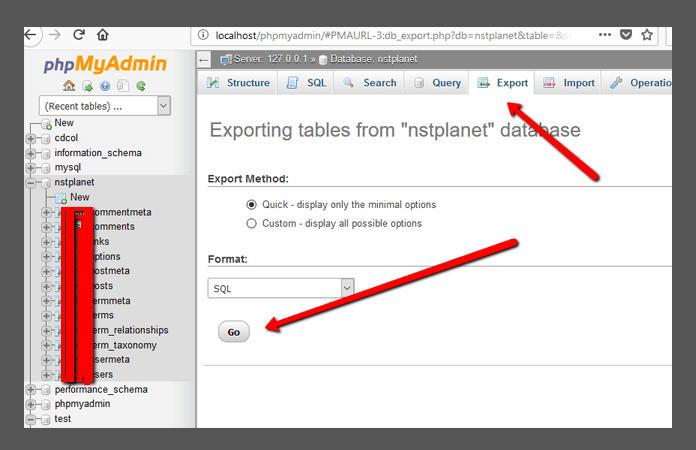
1) Login to your purchased hosting and create database there.. you can follow this topic to know how to create new database.

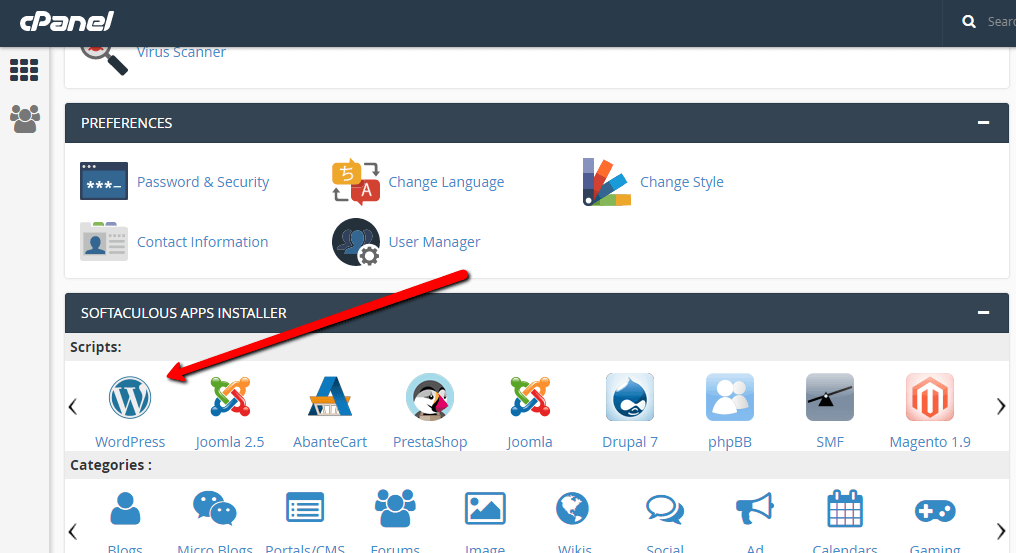
2) After 1st step ..on the control panel …click on “File Manager” ..

install wp manually


3) After this you will be redirected to new window… click on “public_html” there..

install wp manually


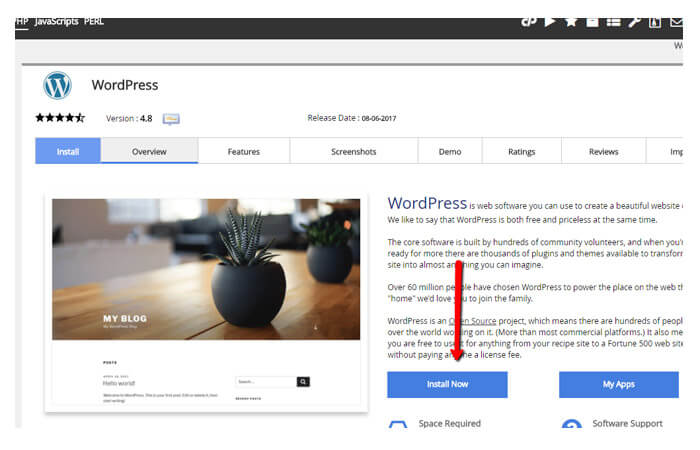
4) Go to WordPress site and download the latest version from there..


5) Upload this zip folder to there on “public_html” ..

install wp manually


6) Choose that file..

install wp manually


7) After completed 100% .. click on Reload link and than select that zip file and after that Extract that to there.

install wp manually


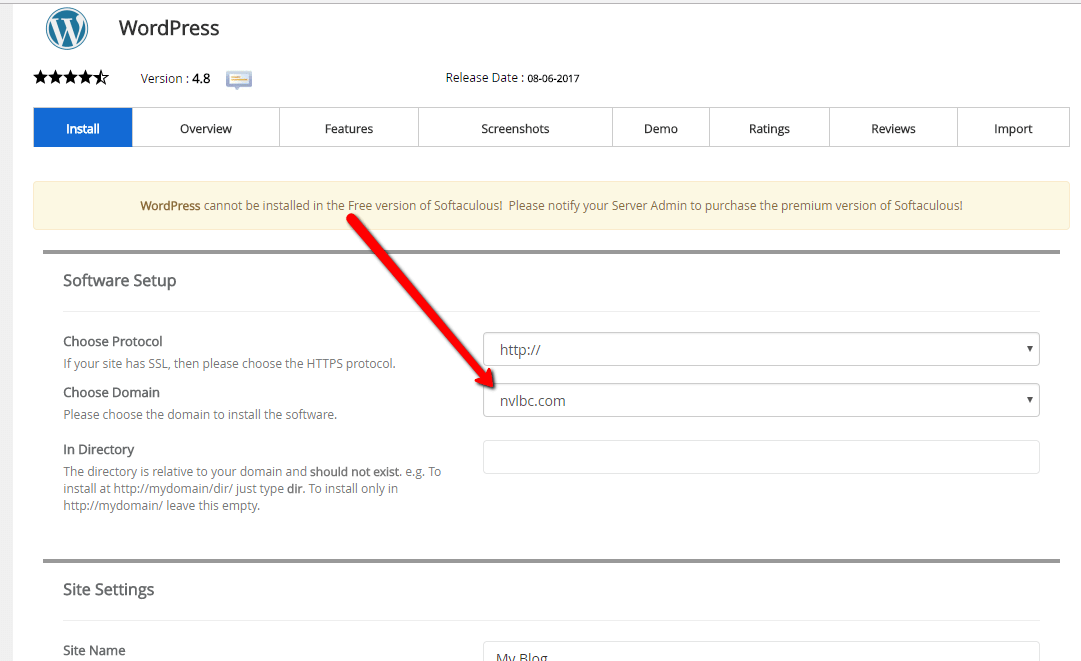
8) If you want to install on your main domain.. like “nstplanet.com” than go into wordpress folder and move files to “public_html” or if you want to install wp on sub domain like “nstpanet.com/mywork” than rename that wordpress folder. Currently this is on “public_html” folder..

install wp manually


9) After this open your domain on browser for next process.. like “nstpanet.com” You will see window like this .. * Please ignore the screenshot url that is from the localhost *


install-wp

10) “Click” on Continue after language selection..the new window will appear there..like this

connect to database in wordpress


11) Click on let’s go and…next window will be ..

connect to database in wordpress


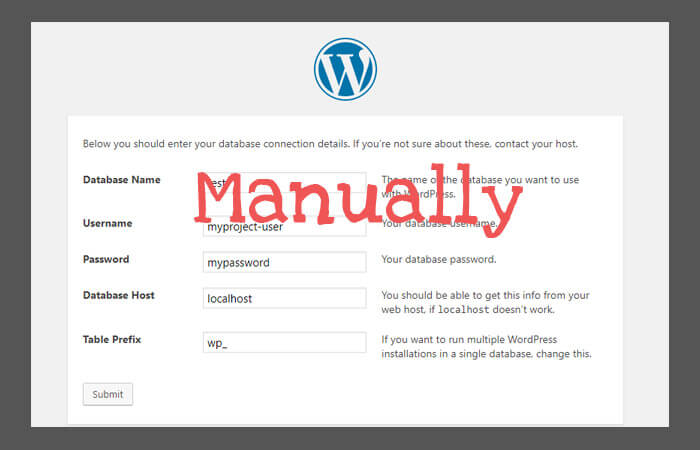
12) So here .. change the database name and others like this..

connect to database in wordpress

13) In the “Database name” field… add your database name, you have created in starting.  Mine was “test” so i added there. Enter username and password and database host will be same and in the “Table Prefix” you can change this like wpnst_ or nst_ or any name with underscore sign.

14) After filled all this click on “Submit” for next step of installation ..

15) “Click ” on run the installer button..

connect to database in wordpress

16) After this… new window will be like this..

connect to database in wordpress

17) So add your site title name and than username than strong password and email like this..

connect to database in wordpress

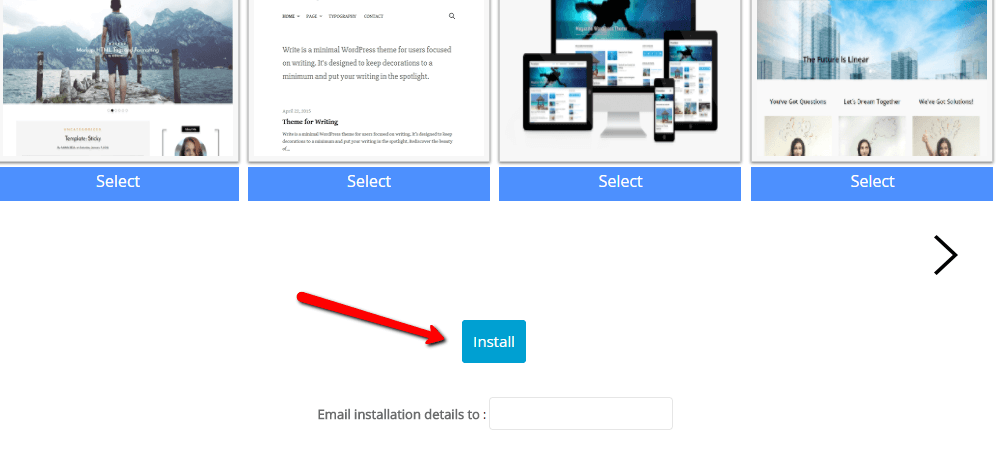
18) Choose the details and save to your “Notepad” or any doc file for future use .. i mean to use for login into website. Click on “Install WordPress“.

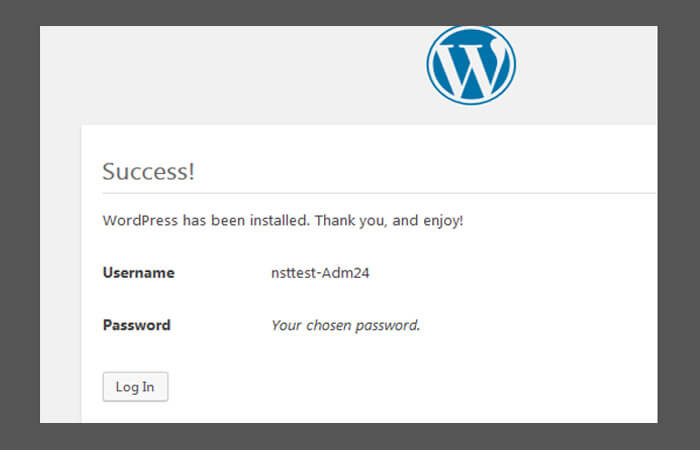
19) it will take some time to complete process.. after that Success message window for installation will be appear. click on login to see the “Dashboard” of
your website.


wp-install-done

20) Put your details for login and you will be redirected to “Dashboard”.

wp-install-done


Enjoy the Experience of WordPress. For any Assistance please contact me… i am here to solve that. 🙂


How to install WordPress on Hosting control panel ?

Here are the Steps to Install wordpress on Hosting Control Panel through Apps Installer…

1) Login to your hosting or cPanel and scroll window to down near APP installer section..

How to install WordPress

2) CLICK on “WordPress” to start process of install.

How to install WordPress in cpanel

3) Select Domain where you want to install..

install wordpress

4) Scroll Down and  create username and password.

How to install WordPress select database

5) Scroll down and click on “Install”..You can also add email to receive login details you entered above..

click on install button ..  install WordPress

6) Your installation is started now. Next window will show you All logins details.

I hope this helps you alotFor any further help … Contact me..

Thanks 🙂

How to create database on hosting Control Panel ?

To create database on hosting Control Panel .. here are the Steps to create Database and assign user to it:-

1) Login to your website hosting and find “database”.. and click on “MySQL database” under “Database” section.

create database on hosting Control Panel


2) It will redirect you on this page..  add name for database and click on “Create Database”

create datbaase in cpanel


3) After created this click on “Go Back” link to go previous window to create username for database..

create datbaase in cpanel


4) Add username and password .. like this

create datbaase in cpanel


5) Click again to “Go Back” and assign that user to created database.. like this

create datbaase in cpanel


6) Click on “Add” and new window will be like this..

create database hosting Control Panel


7) Click on “All Privileges” at top to select all the items and than save this.

Now your new Database is created and also assigned username too. You can use this database to install word-press manually or other database related work.

🙂

Export and Import database from cPanel MySQL ?

A ) Database Export Steps :-

Here are the steps to Export DB from cPanel

1) Login to your website hosting or type /cpanel after your website url to open the login dialogue box .

2) After login in the control panel window find “phpMyadmin” … it will under “Databases” section..

phpMyadmin cpanel hosting


3) click on that and  new window will open…like this .. so follow the steps i mentioned there… select the database you want to export and than click on “Export” 3 point top right.

export import database phpmyadmin


4) After click on “Export”.. new window will be..

export data from phpmyadmin

5) After Click on Go .. database will be downloaded to your machine. 🙂


B ) Database Import Steps :-

Here are the steps to import DB to cPanel

1) For this process you have to create database first. you can follow this topic if you need help to create..

2) After the 1st step… select the database and follow the screenshot..

import data from phpmyadmin


3) Select that database like upper one image and than click on Import ..top right ..

import data from phpmyadmin


4) After click on Go .. it will start importing and can take some time for processing..

import data from phpmyadmin


So here is Import has been successfully finished“…  Done 🙂

How to Export and Import database file from Localhost MySQL ?

A ) Database Export Steps :-

Here are the steps to Export DB from Localhost

1) Go to your favorite browser and type “http://localhost/phpmyadmin”

2) Make sure Your “XAMPP” Server is started before doing the 1st step.

3) After visit “http://localhost/phpmyadmin” new window will open…like this .. so follow the steps i mentioned there… select the database you want to export and than click on “Export” 3 point top right.

export and import database from localhost


4) After click on “Export”.. new window will be..

export and import database from localhost phpmyadmin

5) After Click on Go .. database will be downloaded to your machine. 🙂


B ) Database Import Steps :-

Here are the steps to import DB to Localhost

1) For this process you have to create database first. like this..

export and import database from localhost phpmyadmin


2) Put your database name here like .. “test”.. and click on crate button after this.. new database will appear on left side panel…like this..

export and import database from localhost phpmyadmin


3) Select that database like upper one image and than click on Import ..top right ..

export and import database from localhost phpmyadmin


4) After click on Go .. it will start importing and can take some time for processing..

export and import database from localhost phpmyadmin


So here is Import has been successfully finished“…  Done 🙂

How to install WordPress on Localhost (XAMPP) ?

For Installation of WP .. it will not take more than 5 minute’s to install. Let’s Go… I have tried my best to explain installation Steps… 🙂
So here is the Steps to follow you :-

  1. Install XAMPP server if you dont have on your Machine.
  2. okay, after that open the XAMPP Control panel and start the “Apache” and “MySQL“.. like this..
    start xampp server localhost
  3. Go to WordPress site and download the latest version from there..
  4. Open the “xampp” path … if you installed it on “C” Drive than “C:\xampp\htdocs\” and Create new folder there like.. “myproject”.. Mine is “nst” and Extract that downloaded folder there and rename that folder ..like “testing” or whatever you project name.. 

    start xampp server localhost

  5. Than go to your favorite browser and type “http://localhost/nst/nst is a folder name where mine all the projects are created. You can add your folder name and than project folder name like ..”http://localhost/nst/testing/testing is my project name.
  6. On the new tab of browser type “http://localhost/phpmyadmin” to create database for your project.start xampp server localhost
  7. Type the name of the database as per your project.. i created there “test“.
  8. After created DB .. go to your previous tab where the projects folder is opened and type project name after that like “http://localhost/nst/testing/“.
  9. You will see window like this ..
    install wp on localhost xampp
  10. “Click” on Continue after language selection..the new window will appear there..like this
    install wp on localhost xampp
  11. Click on let’s go and…next window will be ..
    install wp on localhost xampp
  12. So here .. change the database name and others like this..install wp on localhost xampp
  13.  In the “Database name” field… add your database name, you have created in starting.  Mine was “test” so i added there. Username will be same as “root” ..Password will be empty and database host will be same and in the “Table Prefix” you can change this like wpnst_ or nst_ or any name with underscore sign.
  14. After filled all this click on “Submit” for next step of installation ..
  15. “Click ” on run the installer button..install wp on localhost xampp
  16. After this… new window will be like this..start xampp server localhost
  17. So add your site title name and than username than strong password and email like this..install wp on localhost xampp
  18. Choose the details and save to your “Notepad” or any doc file for future use .. i mean to use for login into website. Click on “Install WordPress“.
  19. it will take some time to complete process.. after that Success message window for installation will be appear. click on login to see the “Dashboard” of your website.install wp on localhost xampp
  20. Put your details for login and you will be redirected to “Dashboard”.install wp on localhost xampp


Enjoy the Experience of WordPress. For any Assistance please contact me… i am here to solve that. 🙂

Top Scripts for .htaccess file to modify the website !

htaccess

1) # If html page exists, run it, if not, run php file with same name.
RewriteCond %{REQUEST_FILENAME} !-f
RewriteCond %{REQUEST_FILENAME} !-d
RewriteRule ^(.*)\.html$ $1.php [L]

2) # Force www: if you want to run the site pages with www :-
RewriteEngine on
RewriteCond %{HTTP_HOST} ^nstplanet.com [NC]
RewriteRule ^(.*)$ http://www.nstplanet.com/$1 [L,R=301,NC]

* You can change the nstplanet.com url as per your need.

3) # remove extension from end of file like .html or .php:
RewriteCond %{REQUEST_FILENAME} !-f
RewriteRule ^([^\.]+)$ $1.html [NC,L]

4) # Redirect php|htm extensions to html

RewriteCond %{THE_REQUEST} ^[A-Z]{3,}\s/+(.+?)\.(php|htm)[\s?] [NC]
RewriteRule ^ /%1.html [R=301,L,NE]

5) # For Gzip compression (SEO)

# Compress HTML, CSS, JavaScript, Text, XML and fonts
AddOutputFilterByType DEFLATE application/javascript
AddOutputFilterByType DEFLATE application/rss+xml
AddOutputFilterByType DEFLATE application/vnd.ms-fontobject
AddOutputFilterByType DEFLATE application/x-font
AddOutputFilterByType DEFLATE application/x-font-opentype
AddOutputFilterByType DEFLATE application/x-font-otf
AddOutputFilterByType DEFLATE application/x-font-truetype
AddOutputFilterByType DEFLATE application/x-font-ttf
AddOutputFilterByType DEFLATE application/x-javascript
AddOutputFilterByType DEFLATE application/xhtml+xml
AddOutputFilterByType DEFLATE application/xml
AddOutputFilterByType DEFLATE font/opentype
AddOutputFilterByType DEFLATE font/otf
AddOutputFilterByType DEFLATE font/ttf
AddOutputFilterByType DEFLATE image/svg+xml
AddOutputFilterByType DEFLATE image/x-icon
AddOutputFilterByType DEFLATE text/css
AddOutputFilterByType DEFLATE text/html
AddOutputFilterByType DEFLATE text/javascript
AddOutputFilterByType DEFLATE text/plain
AddOutputFilterByType DEFLATE text/xml

6) # Remove browser bugs (only needed for really old browsers)
BrowserMatch ^Mozilla/4 gzip-only-text/html
BrowserMatch ^Mozilla/4\.0[678] no-gzip
BrowserMatch \bMSIE !no-gzip !gzip-only-text/html
Header append Vary User-Agent

How to Hide/Close Popup by “Esc” key from keyboard ?

Sometime we want to hide the popup or run any script by just pressing “Esc” key from the keyborad..

Here is simple code..

// hide popup model by pressing escape button
$( document ).on( 'keydown', function ( e ) {
if ( e.keyCode === 27 ) { // ESC
$('.popupimg').remove();
$("#nst-popup").hide();
}
});
});

 
You can change the script as per your need… 🙂


How to share the posts or pages on social sites ?

Here are the All social share links..

I used the Font-Awesome icons here… you have to download the CSS file form their site and link the stylesheet etc.. to show the icons or you can just use the text “Facebook”, “Twitter” etc..

1) If you going to use on Static pages like HTMl than download this file.

2) If you are going to use on Dynamic site like ..Wordpress, Joomla or an PHP.. than download this file.

Click to Chat