Author: NST

Myself Narender Singh Thakur ( NST ) and i share my Experience/Knowledge and Tricks for folks and beginners to solve their issues while making websites through this Planet.

How to open link in new window/tab html/Javascript ?

To open link in new tab just use ‘target=”_blank” ‘. in anchor tag… like this

<a href="www.nstplanet.com" target="_blank">nstplanet.com</a>.
 
Sometime we want to open link in window… so here the script..You can change the width and height as per your need..

<a onclick="window.open('http://nstplanet.com', '_blank', 'location=yes,height=500,width=600,scrollbars=yes,status=yes');">Nurpur</a>


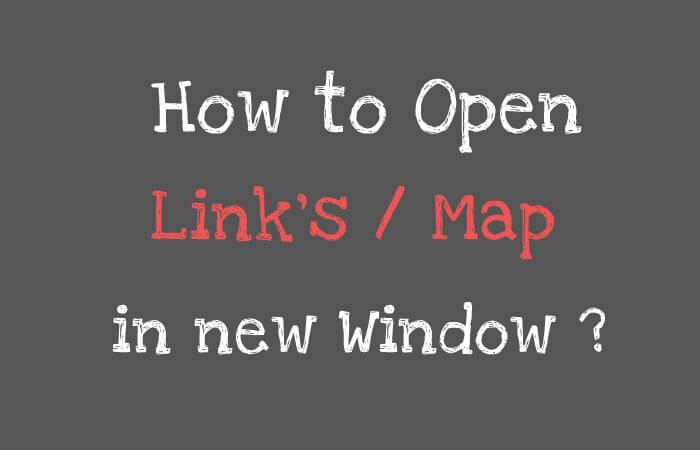
If you want to open MAP in new window so here is..
 

<a onclick="window.open('https://www.google.com/maps/embed?pb=!1m18!1m12!1m3!1d13489.72892895275!2d75.87734607663494!3d32.300239597895036!2m3!1f0!2f0!3f0!3m2!1i1024!2i768!4f13.1!3m3!1m2!1s0x391c82b83d3e067f%3A0x3f499a1cef47976b!2sNurpur%2C+Himachal+Pradesh!5e0!3m2!1sen!2sin!4v1522411790156', '_blank', 'location=yes,height=450,width=700,scrollbars=yes,status=yes');">Nurpur</a>


CLICK ON ME FOR DEMO..


How to Pay and Schedule a Appointment for Passport ?

So after Submitted/Save the Application form.  here is the next thing to do..Go to homepage if you are not logged in.

1) Click on “Existing User Login” at left top of the page and put your email and than password to login the site…to view the saved form.


2) After that this type of window will open and click on top left option of the page like this..


3) Than like this…Click on “Pay and Schedule appointment” link..


4) Choose Online Payment…


5) After this it will show the option for you to choose which one is suitable as per your location and also it show the availability of the date. Mine was HP (Kangra) so i choose Kangra. You can choose as per you showing list.. like this..


6) Select the right options from the dropdown…


7) After Click on “Next”…


8) Next is option to choose the way to make payment…


After the payment it will send you email and also check the appointment date with message of success of payment.


How to apply online for Fresh Passport ?

Here are the documents that need to apply online Passport.

1) Aadhaar Card.
2) Voter ID.
3) 10th certificate.
4) PAN card (Optional).
5) Email id

All these are used for fill the forms.. like you know “Aadhaar” card number is necessary everywhere. Voter id or Aadhaar will use to fill the correct address and 10the certification will use to fill the correct Name of your and your parents. This is also use for D-O-B.  Email id will use in first step of form and for login time too when you submitted the form.

So here is the procedure..

To Apply online for Fresh Passport visit to User Registration page and fill the required fields. First of all it asked for Name, email , DOB etc.. like this


After fill all the required fields click on Register button and this will send an email to your register email id. Open your email and click on the link it will redirect you next form of the site.

Its a Multiple page form so you have to fill the field as per form description.

After completed/Save the form .. you have to book the appointment for confirmation of the submitted form at Passport office.

Here is the Procedure to Book an Appointment.


Apply custom css to admin area wordpress !

I added custom icon for custom post type.. and that was not aligned so i added or hooked custom style to dashboard through this function.

Add this code to functions.php file of your theme..

// custom css for admin area

add_action('admin_head', 'nst_post_style');
function nst_post_style() {
echo '<style>
#adminmenu .menu-icon-nst_testi img ,
#adminmenu .menu-icon-nst_service img{
padding-top: 6px;
}
</style>';
}

 
custom css admin area wordpress

You can do your style for dashboard through that function. 🙂

How to create sticky header bar for a website ?

If you want to make your header Navbar sticky or fixed at Top on window scroll than here is the solution to follow.


So here is the jquery Scipt

jQuery(window).scroll(function() {
   var scroll = jQuery(window).scrollTop();

   if (scroll >= 200) { 
    jQuery(".nstHeader").addClass("sticky");
    } 
   else {
    jQuery(".nstHeader").removeClass("sticky");
    }

 }); 

In this script , class will added after scroll the window to 200px. You can change the number as per your condition.


On window scroll add/remove class with jquery !

Sometime we want to add class to particular div to make some changes on the page according to that class .  Mostly this situation is happened when we want make our website header sticky or to fix the header at top of the page.

So here is the jquery Scipt

jQuery(window).scroll(function() {
   var scroll = jQuery(window).scrollTop();

   if (scroll >= 200) { 
    jQuery(".nstHeader").addClass("sticky");
    } 
   else {
    jQuery(".nstHeader").removeClass("sticky");
    }

 }); 

In this script , class will added after scroll the window to 200px. You can change the number as per your condition.


How to move comment box to bottom in wordpress !

By using these code we can move the comment box to bottom …which is showing by default in the bottom on the posts. Just add these code to your website theme function.php file.

function wpb_move_comment_field_to_bottom( $fields ) {
$comment_field = $fields['comment'];
unset( $fields['comment'] );
$fields['comment'] = $comment_field;
return $fields;
}
add_filter( 'comment_form_fields', 'wpb_move_comment_field_to_bottom' );

That’s it 🙂


How to hide the Featured image on single view of posts!

Sometime we want to hide the featured image of our website posts. Mostly this featured needs for blog websites. There are many way to do this and we can hide all the single posts featured image through the CSS too.

But if you want to hide image only for some of the particular posts than its little difficult and frustrated to do through CSS again and again by using that post id.

So after the research/tested i found a simple solution to hide the posts image from the backend. i developed a plugin and through that in the editing section of the posts near the featured image a dropdown will appear to choose the “No” and “Yes” option for this. like this..

So you just select option here to “yes” if you want to hide any post. Here is the Plugin.. just download it and upload to your site than activate it after activated follow these steps..

PLEAE NOTE : YOU CAN COPY THE CODE FROM YOUR WEBSITE DASHBOARD.

Download Plugin

Its Done 🙂


If in Joomla backend Temp and Log folder showing unwritable !

Sometime whenever we trying to update Joomla and it gives us a message of Error 0 Cannot open file for writing log than Please first follow these Steps.

1) If after following these step the issue still occur and in joomla backend the Temp and Log folder still showing “Unwritable” like this ..

2) To check this information go to joomla backend than System  >> System Information >> Folder Permissions .

3) If “unwritable” exist there for last two columns than copy this code

<?php
$path = getcwd();
echo "Your Joomla Path is: ";
echo $path;
?>

and paste into notepad or whatever your favorite text editor and save it with any name  like rootinfo.php than upload to root directory of where Joomla installed.

After this open that file in browser and it will show you exact path of your website installed folder..
you can correct the path of both folders through configuration file or in backend by visiting here.. System >> Global Configuration >> than follow the image please..

4)  Please be careful don’t forget to add /tmp or /logs in the end of the path or the path of the file with name where your these both file stored.

I hope this helps you to solve this kind of issue. 🙂


Error 0 Cannot open file for writing log while updating Joomla

Sounds like a permissions issue.
In the Joomla backend, go to:

1). System  >> System Information >> Folder Permissions

2).  Make sure all files and folders apart from the global configuration.php are writable.

3).  If they aren’t, then you will need to change the permissions, so that all folders are set to 755 and files are set to 644.

4). You can do this by using an FTP client such as FileZilla.

5). If you have already done this, then make sure you have defined your log directory correctly, as sometimes the path to the logs folder may be incorrect. To check/change the path, in Joomla backend, go to Global Configuration and then choose the Server tab and check if the Path to Log folder is correct.

I hope this helps to solve your issue  🙂


Click to Chat